Tuesday, November 20, 2018

Best Ever | My Creative Scrapbook - November Tutorial


Hi My Creative Scrapbook friends! I'm back today with a Pinterest inspired project using this month's Main Kit 


I love the overall cool reco design and decided to use it as an inspiration to design my page.      


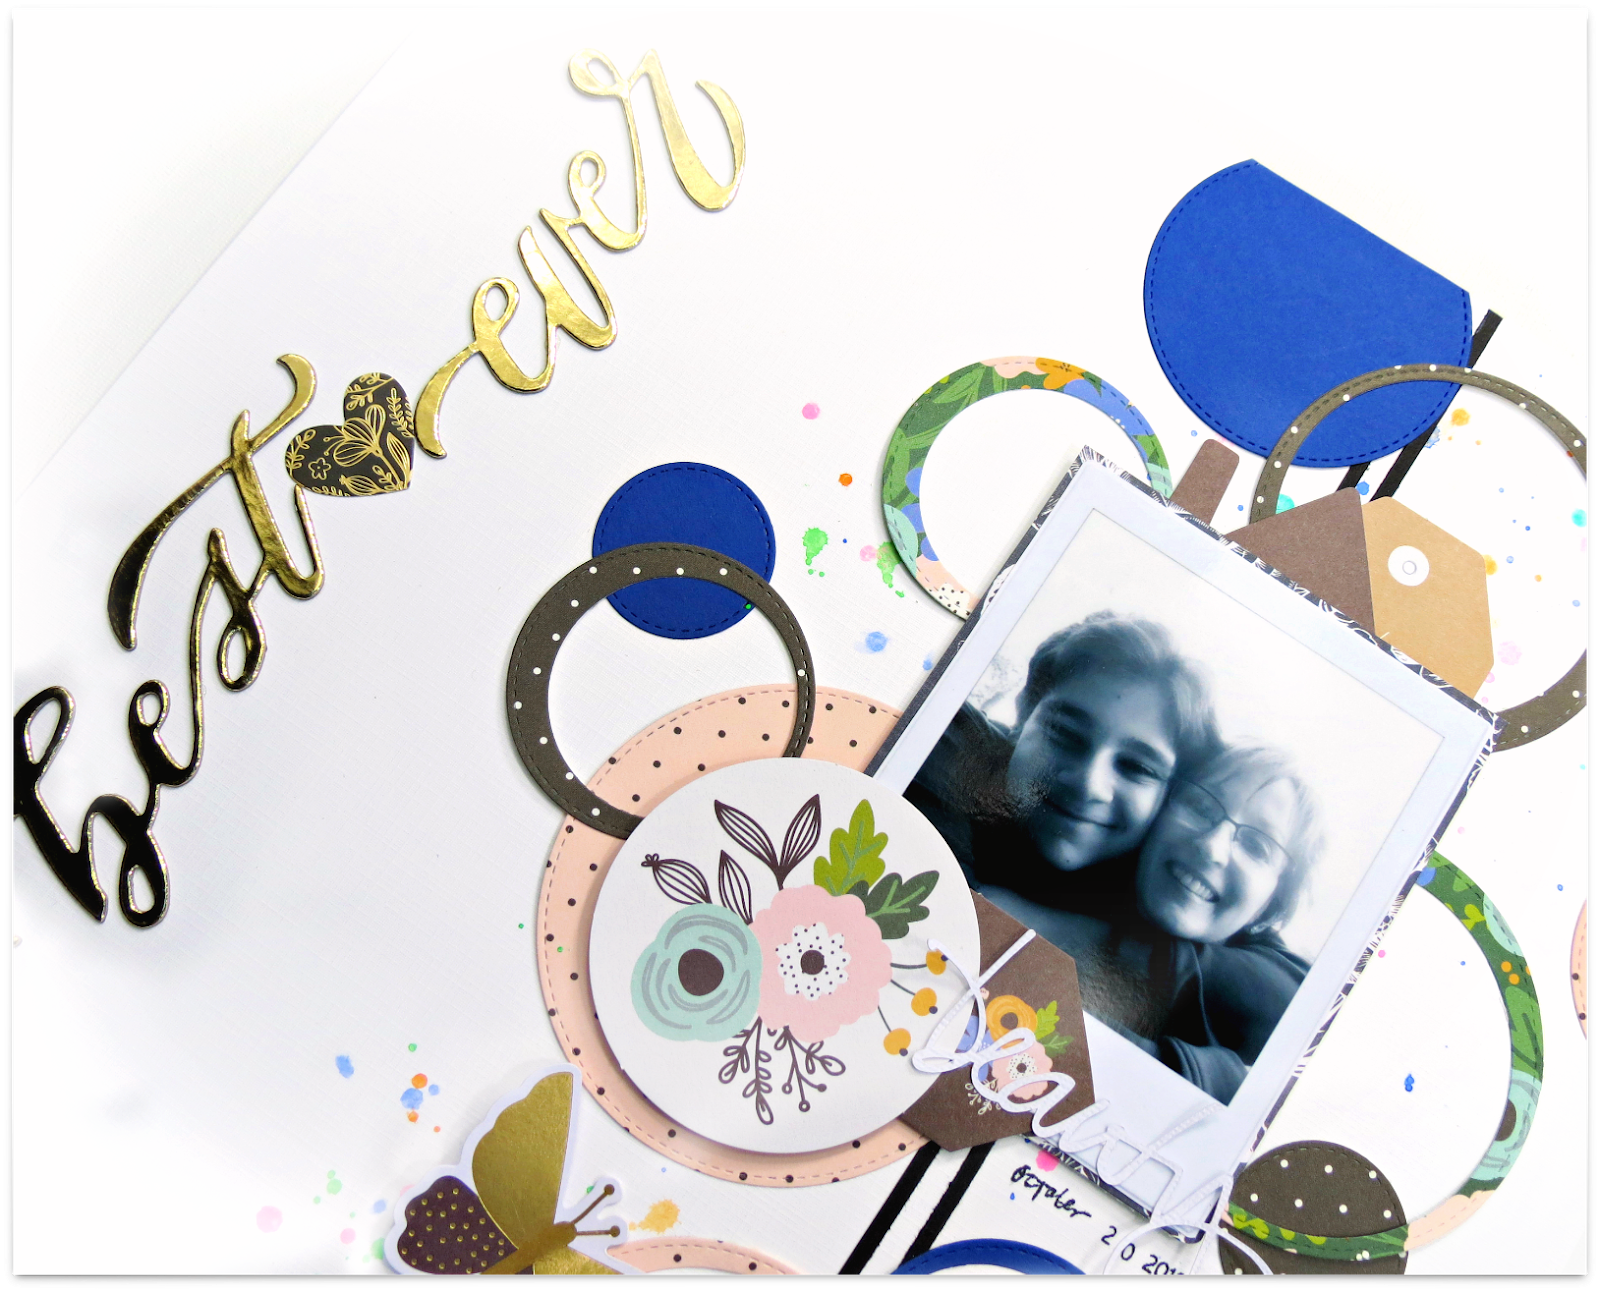
With all the gorgeous pattern paper found in the 'Along the Way' collection, it was very difficult to select which ones I wanted to use for my circles. I decided to go with one floral and two of the polkadots papers as well as a solid blue cardstock.
        

Next, I added some paint splatters to my background by select a few different Dylusions Ink Spray to match the colors in the floral pattern paper and applied with a small paint brush.


I arranged the circles along the right hand side of the page starting at top and working my way down to the bottom.


Keeping with the design, I added a couple of black cardstock strips down the center of my circles and love the extra detail this create.


Now it was time to start adding my embellishments. First, I matted my photo with one of the pattern paper found in this months main kit and adhered it down with some foam tape. Next, I created a small cluster of embellishments to the bottom left hand corner of the photo that includes a couple of 'Along the Way' Ephemera pieces as well as a die-cut.


Under the top edge of my photo I tucked an icon die-cut and a tag.

     
  I added my title down the left hand side of my page using the beautiful gold foil chipboard stickers also include in this months main kit and finished the layout off with a couple more die-cut pieces.

I hope you felt inspired today and if you're not a subscriber yet, give it a try. The kits are all so beautiful and you will not regret it!!!!

Thanks for stopping by :) xx


Friday, November 09, 2018

Artist At Work | Paper House Productions-Glue Dots Adhesives Team-up


Hi Paper House fans! All this week Paper House is teaming up with Glue Dots Adhesives ...for my page I use both the Mini Glue Dots and Permanent Glue Tape.  


I started my layout off with a starburst cut file from The Cut Shoppe, the background cut file was cut from white cardstock and then, I used the beautiful prisms pattern paper  from the 'Color Washed' paper pad to back it. The Permanent Glue Tape adhesive from Glue Dots was then use to adhere the cut file and the pattern paper together.


I wanted to create a bit more texture to my background and decided to use embroidery floss to create a string art design. The mini glue dots from Glue Dots was great to use as a way of attaching the floss to my cardstock.


Next, I created some layers behind my photo using pattern paper from both the 'Little Man' and 'Color Washed' paper pad. The Art Class 3D stickers was use to create a title for my page and also as an embellishment.

To the bottom of my photo, I added a few die-cut stars and use the mini dots to adhered them to my photo. I finished the page off with some ink splatters and really love how this turned out!   


     Thanks for stopping by today! I hope I inspired you to create something beautiful using your Paper House products as well as Glue Dots Adhesives
  

Cut File use: Starburst background 


Supplies:


Tuesday, November 06, 2018

I Love You | My Creative Scrapbook


Hi My Scrapping Friends!!!

Today I have a new layout to share using the gorgeous November main kit from My Creative Scrapbook! This month the main kit is featuring the BEAUTIFUL new 'Along The Way' collection from Pebbles...with so many beautiful patterned papers and embellishments to choose from, you're sure to have a marvelous time document those little moments. I decided to document this silly selfie of our family enjoying our new home.

         
I started by using the notebook page patterned paper for my background. I also decided to leave the branding strip at the bottom of the paper on and added another strip of pattern paper to the top of the page. Next, I selected a few phrase pieces from the foil accent Ephemera pack, matted my photo as well as created a fishtail tag/banner from the cute "bird Seed' patterned paper and once I had everything arrange to my liking, I added some hand stitching and glue in place. 


To the banner, I added one of the cut apart journaling card and adhered it down with some foam tape.


The gold foil chipboard stickers from this month's main kit was used to create a title for my page.


A few more ephemera pieces was added to my layout to finish it off.

 I hope you felt inspired today and if you're not a subscriber yet, give it a try. The kits are all so beautiful and you will not regret it!!!!

Thanks for stopping by :) xx